GitHub Gists is a tool developed by GitHub which provides a simple way to share code snippets with other people. Gist snippets work similarly to a conventional GitHub repository in that they can be forked and cloned; each gist is a repository. They can be public or secret and even created without a GitHub account.
GitHub Gists has become a valuable tool among the developer community since it supports multiple features such as version control, commenting, snippet embedding in websites and quick setup without creating a repository.
Also, it provides a more minimal approach to GitHub repositories since it does not support issues, pull requests, projects or actions.
In this article, we will discuss how to use Gists, their different features, main use cases, using the Gist VS Code extension and performing some hands-on examples.
Code can be found in the Blog Article Repo. Gists can be found in the GitHub Gists Repo.
Use cases
There are multiple use cases for GitHub Gists. Because of its versatility and simplicity:
- We can use them for quickly sharing code snippets with other people.
- We can embed them in our website, which a conventional GitHub repository does not allow.
- We can use an HTML embed link, and the snippet will automatically display along with a code window. It is worth mentioning that any update in the gist will directly reflect on the embed.
- They’re also supported by practically every content management software (Medium even has a dedicated interface for them).
- We can use them to share annotations in Markdown.
- We can use them to display tabular data using a
.csvextension. These will render as actual tables when embedded.
How to use GitHub Gists?
1. Creating a new gist
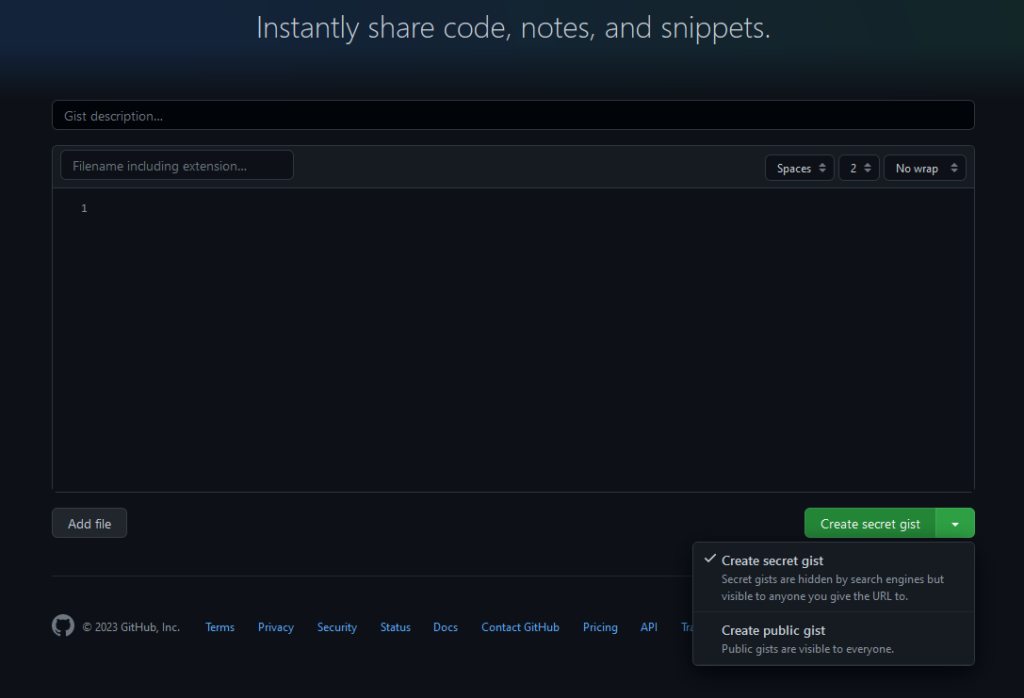
We can create a new gist by heading to the GitHub Gists homepage:
- We can then define a gist description. This is equivalent to the repository description field on GitHub.
- We must also include a file name with its extension for Gists to be able to provide syntax highlighting and proper formatting.
- Then, we can input the gist content.
- From there, we can choose to create a secret gist or a public gist. We can change this later in the settings, as with conventional GitHub repositories.
- We can have multiple files belonging to the same gist. We can add more files by using the Add files button.
We can view our created gists by clicking on View your gists:
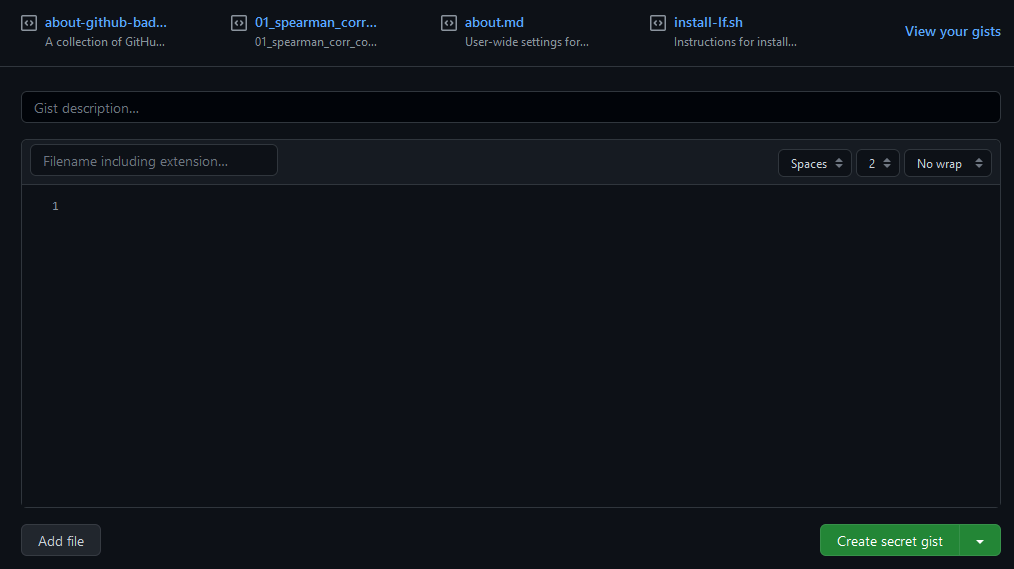
From there, we can:
- Display the gist as well as any comments.
- Edit, delete or star the gist.
- Create an embed link and use it in any content creation platform.
- Create a share link which can be sent to anyone.
- Create an HTTPS link for cloning the repo.
- Create an SSH link for cloning the repo.
- Download to GitHub Desktop.
- Download as
.zipfile.
Managing GitHub Gists using VS Code
VS Code has an extension for GitHub Gists management written in TypeScript. It adds several valuable functionalities, such as creating & managing gists, inserting text fragments from gists, and more.
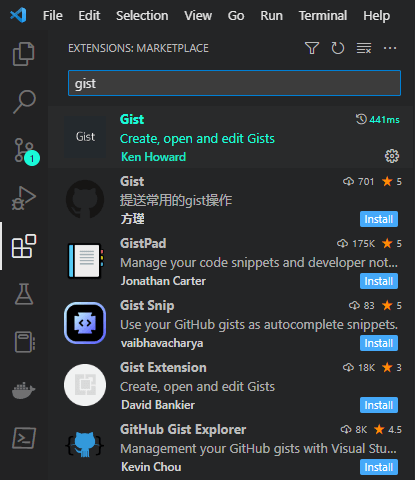
We can get started by going into VS Code, heading to extensions, and looking for Gist. We can then install the Gist extension by Ken Howard:
Upon installation, we will authenticate our profile with GitHub by creating a Gist profile, but first, we need to create a new GitHub Personal Access token:
- Head to GitHub.
- Select the Profile icon.
- Select Settings.
- Go to the Developer Settings section at the bottom of the left panel.
- Select Personal Access Tokens.
- Generate a new Personal Access Token.
- Specify a Token description.
- Specify Expiration.
- On Selected Scopes, check the gist option only.
- Select Generate token.
We will need to save this token somewhere safe (and clearly not in any Public Repository; otherwise, the token will deactivate automatically) since we cannot see it again.
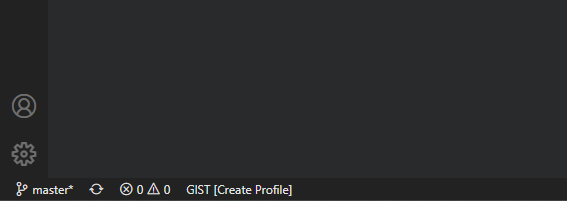
We will then go back to VS Code and select Create Profile. We will select a Common profile:
We will then input the key we generated, press enter, create a Profile Name, and press enter again.
To create and track a new gist from VS Code, we can:
- Open a new blank document.
- Input our snippet.
- Open the command palette by typing Ctrl + Shift + p or f1 (Windows).
- Search for the
Create New Gistcommand. - Input our gist name along with the file extension.
- Input our gist description.
- Decide if our gist will be Public or Secret.
Upon creation, we will receive a confirmation message and will be able to view our newly created gist in the browser.
The best thing is that we can update our gist at any time by simply inputting additional code and saving the document (most of the time, it even autosaves the content, so it practically updates as we type). The Gist extension will handle the commit & push process for us.
One thing to remember is that when we create a new gist from an existing file, that file will not become the gist; instead, the extension will copy it and create a new gist in return.
If we would like to open a gist from within VS Code, we can open the command palette and select the Open Gist command. The extension will create a temporary file on C:\Users\username\AppData\Local\Temp.
Below is a complete list of commands we can use:
Code
GIST: Create New Gist
GIST: Open Gist
GIST: Open Favorite Gist
GIST: Delete Gist
GIST: Delete File
GIST: Add File
GIST: Open Gist In Browser
GIST: Insert Text From Gist File
We can also change default Public or Secret gists and current profile settings.
Examples
We will be reviewing four examples. They can be consulted in the example-gists-1.py gist. Outputs for each case can be found in the Appendix section.
1. Creating a Gist for authoring using docstrings
As mentioned earlier, we can create a new gist containing a specific docstring and add it to any file.
We will start by creating a new file in VS Code and populate it with the following:
Code
"""
Created on WEEKDAY MTH DAY HH:MM:SS YYYY
@author: Our Name
GitHub: Our GitHub URL
Website: Our Website URL
Contact: Contact Information
"""We will create a new gist by going to the command palette and executing the GIST: Add file command.
We can use the following attributes:
- Name:
authoring-docstring.py - Description: Authoring docstring containing date, author, GitHub URL, Website URL and contact information
- Type: Secret
We can confirm that our gist was created by visualizing it on the browser.
We can then create a new file in VS Code named authored-script.py, open the command palette, execute the Insert Text From Gist File command, choose our authoring-docstring.py gist, and the text is inserted into our new document.
This can be further automated by assigning custom keymaps to the command used.
For the output example, refer to the Appendix, example-gists-1.py.
2. Creating a code snippet embed
We can directly embed a script to our website using gists. The embed renders in a code window and is updated whenever we commit changes to our gist. We will start by creating a new blank file on VS Code and naming it embed-script.py.
We will then import our newly created authoring docstring by going to the command palette, executing the Insert Text From Gist File command and selecting our authoring-docstring.py gist.
Next, we can define a simple function which will accept two arguments as inputs and return a new object:
Code
def myFun(my_list):

    '''
    Parameters
    ----------
    my_list : list
        Contains a set of integer numbers.
    Returns
    -------
    sum_of_nums : int
        The sum of the numbers inside my_list.
    '''
    print(f'List contains {len(my_list)} numbers.')

    sum_of_nums = 0
    for i in my_list:
        sum_of_nums += i

    print(f'Sum of numbers is {sum_of_nums}.')

    return sum_of_nums

my_list = [1, 2, 3, 4, 5]

myFun(my_list)Output
List contains 5 numbers.
Sum of numbers is 15.
Now that we know that our function works as expected, we can create a new gist by opening the command palette and executing the GIST: Create New Gist command with the following parameters:
- Name:
embed-script.py - Description: A simple function that adds all elements of a list
- Type: Public
It is important to set our new gist as Public. Otherwise, we won’t be able to embed it.
We can either click the Open Gist on Browser button, use the GIST: Open Gist in Browser command, or head to our GitHub Gists homepage, where we will see our newly created gist. We will now copy the embed URL into our website post using an HTML code block.
For the output example, refer to the Appendix, example-gists-2.py.
3. Creating a tabular data snippet embed
Gists let us include a .csv tabular file. When uploaded to GitHub Gists, the snippet renders into an actual table with exciting properties, as we will see in this example.
We will start by creating a new blank file on VS Code and naming it tabular-data.csv. We will then populate our table with four columns and ten entries:
Code
Name,Surname,Age,Occupation
Godfrey,Hazel,40,Dancer
Chloe,Evan,15,Poet
Charles,Dickens,210,Writer
Marcy,Zak,32,Nurse
Leo,Tolstoy,195,Writer
Calista,Harve,25,Nurse
Sebastian,Duane,32,Musician
Oscar,Wilde,169,Writer
Mandalyn,Gabby,12,Student
Mia,Natasha,1,ToddlerWe will create a new gist by using the GIST: Create New Gist command with the following parameters:
- Name:
tabular-data.csv - Description: A sample of random people
- Type: Public
We can then open our gist in a browser. When a gist containing tabular data is generated, it’s rendered as an actual table. We can look for values using the Search this file filter. Finally, we can copy the embed URL and add it to our website using an HTML code block.
Unfortunately, the search functionality is apparently unavailable on embeds and is limited to the GitHub Gists page (maybe we’re missing something, and this can actually be done).
For the output example, refer to the Appendix, example-gists-3.csv.
4. Creating a Markdown snippet embed
Gists support virtually any programming language, including markup languages such as Markdown.
We will start by creating a new blank file on VS Code and naming it markdown-document.md. We will then insert some markdown code on our document:
# Markdown
## A brief introduction
Markdown is a lightweight markup language used for creating formatted text. It was created in 2004 by John Gruber & Aaron Swartz and has been widely adopted by various document-creation software applications. Markdown accepts basic markup syntax; depending on the application, it supports extended syntax for more advanced formatting.
---
### Markdown supports multiple elements such as:
- Headers from H1 up to H6
- Paragraph body
- Unordered lists
- Ordered lists
- Inline code
- Code snippets
- Many other elements
### Markdown also supports more advanced formatting, such as:
1. Diagramming
2. Topographic objects
3. LaTeX Code
### Markdown can also include images:

### Markdown is amazing
We could keep on mentioning Markdown capabilities, but we would not end.
Instead, we can consult the [Markdown Documentation](https://github.com/pabloagn/documentation/blob/master/writing-and-formatting/markdown.md#markdown), which includes all of the beforementioned, plus more.We will create a new gist by using the GIST: Create New Gist command with the following parameters:
- Name:
markdown-document.csv - Description: An introduction to Markdown
- Type: Public
We can then open our gist in a browser. When a gist containing Markdown formatting is generated, it’s automatically rendered. Finally, we can copy the embed URL and add it to our website using an HTML code block.
For the output example, refer to the Appendix, example-gists-4.md.
Formatting gists using CSS
A nice feature is that we can format our Markdown code or any other code snippet inside a gist embed by using CSS code.
For this section, we will use CodePen, a web-based social development environment for front-end designers and developers.
We can head to CodePen.io, create a new Pen, and enclose our embed link in a <div>:
Code
<div class="gist-container">
  <script src="our-embed-url-1"></script>
  <script src="our-embed-url-2"></script>
  <script src="our-embed-url-3"></script>
</div>We can then define some variables to help us representing colors:
Code
:root
{
  --all-text-white: #f2f2f2;
  --code-background: #1b1e28;
}We can then set a fixed width and center the contents inside our <div> using CSS:
Code
.gist-container
{
  width: 40%;
  margin: auto;
}Now that we have our layout ready, we can begin styling different selectors. Gists have one main class, .gist, from where we can start. We can then select further sub-classes depending on what we’re trying to change:
Code
/* Gist Background */
.gist
{
    background: transparent !important;
}

/* Meta Bottom tag */
.gist .gist-meta
{
	color: var(--all-text-white) !important;
	background-color: var(--code-background) !important;
	border-radius: 0 0 6px 6px !important;
}

.gist .gist-file

/* Box Border Color */
{
  border-color: var(--table-borders) !important;
  filter: drop-shadow(5px 5px 10px rgba(26, 26, 26, 0.2));
}Although it’s generally bad practice, we need to use the !important property for some selectors since their style is inherited from the default GitHub Gists theme and thus overwritten. We must remember this fact carefully if we’re working with a more extensive CSS sheet.
This process requires tinkering and a browser inspector to select the appropriate classes. Still, the good thing is that some repositories and gists already contain nice-looking templates and fragments. Below are a few examples:
- lonekorean / gist-syntax-themes (This was the repository used as a base to generate the complete style sheet for this example)
- adimancv/css_dark_mode_gist_embed_code.css
- just-jeb/embed-gist-dark-theme.css
This was just a sample of what can be done; a complete dark mode CSS implementation, including code snippets, Markdown and .csv tables, can be found on the github-gists-formatting gist. The gist also includes HTML code for giving structure.
Pens used in this section can be found here.
Conclusions
We have reviewed what gists are, how to create different types of gists, how to embed them into our website and how to format them using simple HTML & CSS code. As we can see, gists are extremely simple yet powerful and can be used for many applications. They are supported in virtually any content management software and provide a way to showcase code snippets, tables and other types of content without requiring any knowledge of web development.